Styling a dashboard
The Style panel and your organisation's templates.
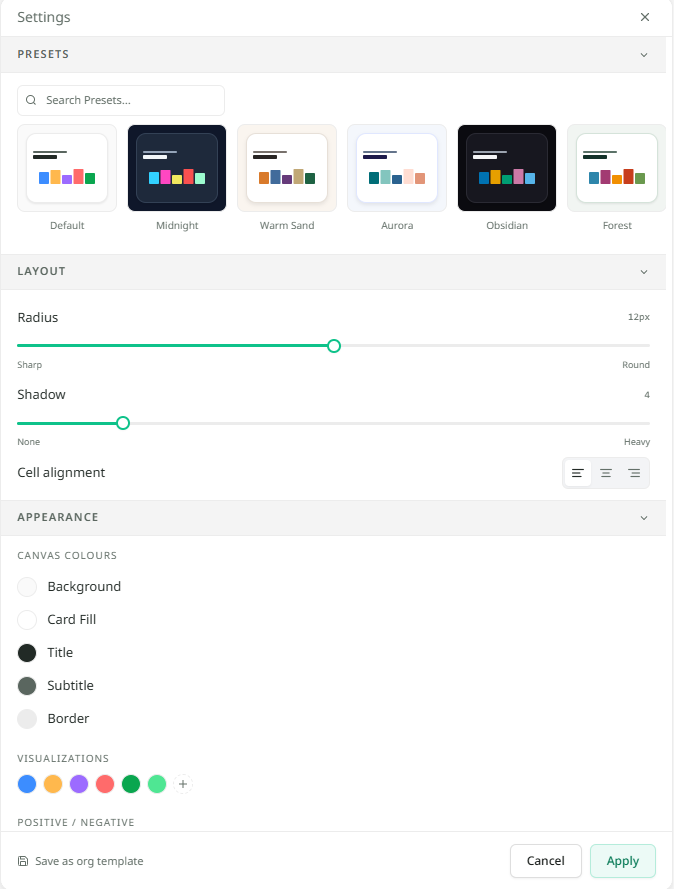
Overview
The Style panel changes how a dashboard looks: the background, the colours of the charts, and how rounded and raised each chart appears. Use it to match your brand, or to make a dashboard easier to read on a wall screen.
Only the dashboard's owner can style it. Click Style at the top of the session to open the panel.
Using a preset
The quickest way to style a dashboard is a preset, a ready-made set of colours and shapes.
- Click Style.
- Under Presets, click one. The dashboard changes straight away so you can see it.
- Click Apply to keep it, or Cancel to go back to how it was.
Your organisation's own templates are listed first, under Organisation. Click Show built-in presets to see the ones that come with Mira. Type in Search Presets... to find one by name.
If your organisation has a default template, a new dashboard already uses it when you first save it. Style templates explains how templates are made.
Changing the details
Below the presets are the controls for each part of the look.
| Part of the panel | What you can change |
|---|---|
| Layout | Radius, from sharp corners to round ones, and Shadow, from none to heavy. |
| Appearance | The canvas colours: the background, the panel behind each chart, titles, subtitles and borders. |
| Visualizations, under Appearance | The colours the charts use for their bars, lines and slices, in the order Mira picks them. |
| Positive / Negative, under Appearance | The colours for going up and going down, such as a rise in sales or a fall in costs. |
Every change shows on the canvas as you make it. Nothing is kept until you click Apply.
What styling changes
The style belongs to this dashboard. It doesn't change any other dashboard, and it doesn't change the numbers. Colleagues you share it with see it in your style. See Sharing and presenting.